Wireless Connection
Basic Concepts
Section titled “Basic Concepts”The IP is the address of your Android device on the local (Wi-Fi) network, for example 192.168.1.101.
Port is the number that comes after the IP address. For example, in the address 192.168.1.101:35511, the port is 35511.
Important! The connection port changes each time wireless debugging is enabled. Also the wireless debugging will be disabled automatically if not using for a few time.
Only for Android 11 and newer.
Pairing
Section titled “Pairing”Performed once.
Pairing - allow you to connect your Android device wirelessly using wireless debugging. It may seem complicated the first time, but you’ll quickly realize how convenient it can be.
Step 1
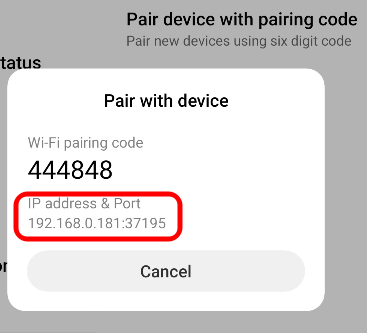
Section titled “Step 1”On your Android device, go to Developer Options - Wireless Debugging (Wi-Fi) - Pair with Code.
Step 2
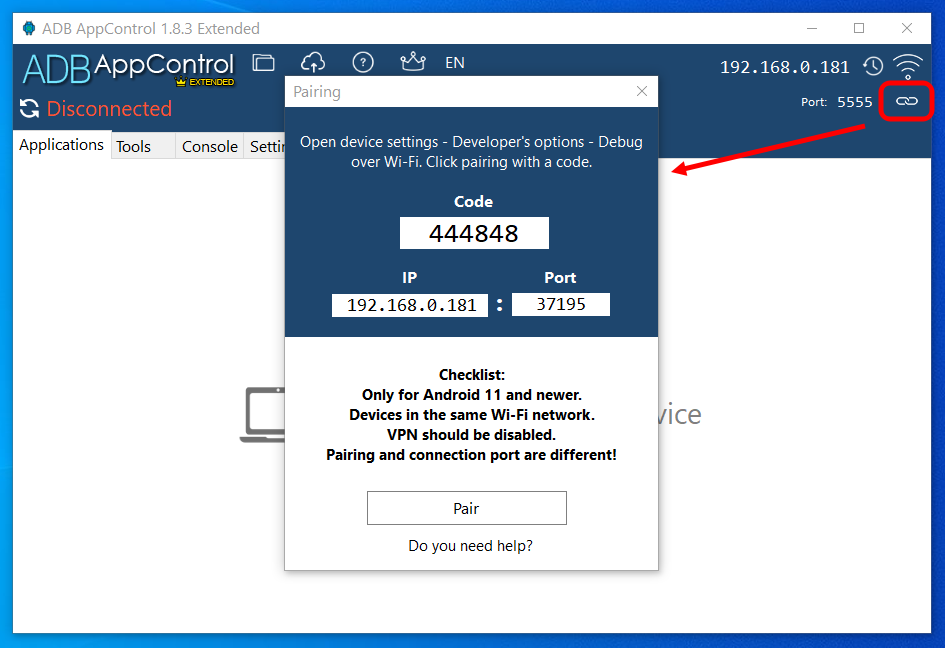
Section titled “Step 2”In the ADB AppControl interface, click the pairing button. Enter the address, pairing port and code as shown in the picture. Perform the pairing.
Step 3
Section titled “Step 3”The pairing window on your device should close by itself and the name of your computer will appear in the list of paired devices.
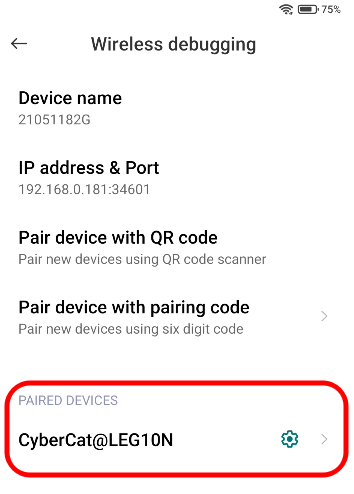
Automatic connection may occur at this point. The paired device can disappear from the list after a while. In this case you need to pair it again.
Connection
Section titled “Connection”Performed each time the device is connected.
Step 1
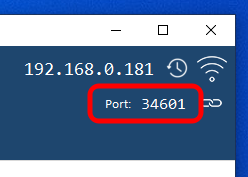
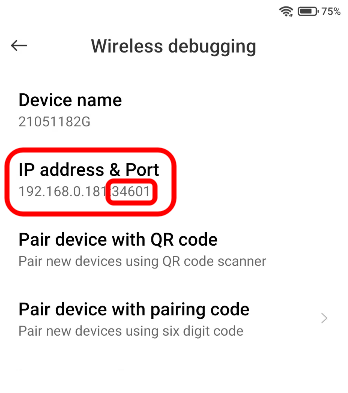
Section titled “Step 1”On your Android device, go to Developer Options - Wireless Debugging (Wi-Fi) - Enable. Memorize the IP address and port number for the connection. Pairing (connection via code) is no longer necessary! At the picture example 192.168.0.181 is an IP-address and 34601 is a Port.
Step 2
Section titled “Step 2”In ADB AppControl, enter the IP address of the device and the port number for connection. Click the connect button. Note that the IP address of the device is usually static, but the port to connect to will be different each time you connect.